Tuesday 28 February 2012

Another Fold Out Book

Hi there

Well as promised yesterday, today I am going to show you another min book I made using the Vita Bella range, from Little Yellow Bicycle. This one was made over a week or two, I kept looking at it and then going back and changing things or adding things to it.
With this one, I think I have kind of gone to town on it as I have made it for my Mum to put pictures in it of her great grandson and her great nephew, who were both born within a week of each other in January.
As you can see rather than just the circle I have added two prima flowers held together with a brad to hold the book together.
When you open out the left and right hand sides you get a photo mat which has been inked with distress inks to take the starkness off the white. At the top you will also see a small round circle this enables you to lift the photo mat open to put either journalling or another photo underneath.

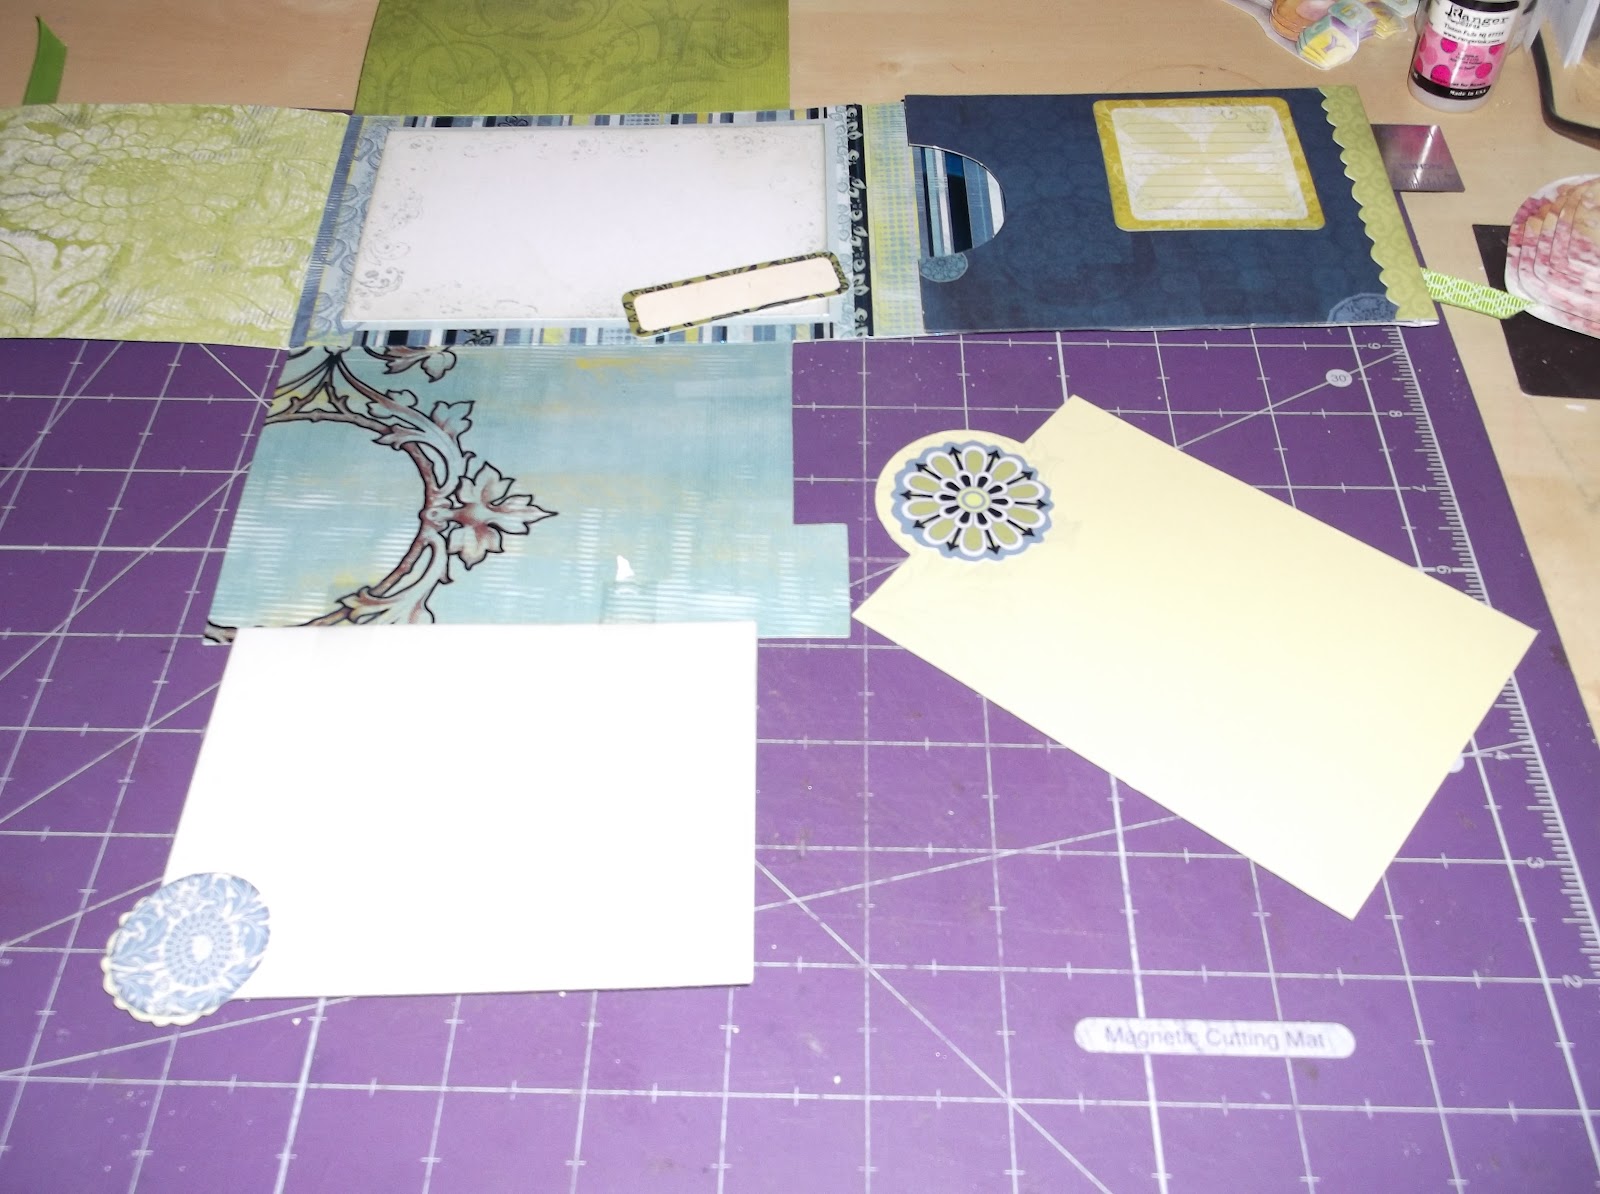
Again when you lift the top and bottom out there are more photo mats. It is quite hard to see but as well as inking the edges with distress inks I have also inked a swirl stamp and stamped this on them as well.
As you can see the three photo mats all are hinged and open up for space for more photos or jounalling.
This photo show more of the tag which is in the pocket on the right hand side. Again this can be used for a photo or to keep information about the births, date, times and weights etc.

Again the project was bought from The Stamp Pad

I hope you like these two different looks from the one project.

Happy Crafting

Monday 27 February 2012

A Fold Out Book

Hi There

Today I would like to share with you a small fold out book from Little Yellow Bicycle, in their Vita Bella range.
This one I made up fairly quickly to put photos in of my niece's baby boy.
This is the book all nicely folded up and tied with some green satin ribbon.
This is the book with both sides opened. On the right hand side is a pocket to either put another photo in or some journaling. On the left hand side is a photo mat.
This is with both the top and bottom flaps open. As you can see there are photo mats on these and in the center panel. As I said at the start of this post this project was a quick one. I made in it an hour and a half one evening. There is so much more you can do with these little books, as I will show you tomorrow. That is one which I was able to spend more time on. Rather than having to do it quickly :-)
The Vita Bella pack for this was purchased from The Stamp Pad.

Sunday 26 February 2012

Hello Again

Well hopefully back to blog land for a bit. I have had a poorly son, and then a hubby in hospital.
Both almost back to their best now thankfully.
So a special card I made for a 50th Birthday.
This is an 8x8" scalloped card base. The backing papers are from Making Memories Noteworthy range. The panel has been die cut with Nestabilities Labels 10. This paper is the revers side of the backing paper used.
The name and sentiment were both cut with my Craft Robo/Silhouette. Both the sprays pf leaves were die cut with Marianne dies in green card. The outer four flowers were from Wild Orchid Crafts and the center one is a Prima cream rose that I inked with a distress ink.
With the exception of the flowers all the products for this card were purchased from The Stamp Pad in Saddleworth.

I hope you like this card.

Tuesday 7 February 2012

Something Useful !

Hi There

Today I would like to share my Kaisercraft Letter Rack. The actual Kaiser kit was a Christmas present from my wonderful friend, Carol. I say useful as my Dear Hubby will look at things I have made and say 'That's nice, what do you do with it!'

The papers I have used are from the Kaisercraft 'Chapter One' collection. I made the project up, although not stuck together, whilst I decided which paper I was going to use on which piece. Then I cut and stuck the papers piece by piece, leaving a little overhanging the board. When the glue was fully dry, I then went round and sanded the edged of the paper off, as this gives a smoother finish.
This is the finished project. I have inked the edges with my Silver leaf Krylon pen,
This is the bottom pocket. I used Glossy accents on the butterfly on the paper and added glamour dust whilst still wet to add some sparkle.
The second pocket had a very plain piece of paper on it, so I trimmed it with a border from the papers. (on Kaiser papers where the name and range details are on the front of a 12x12 on the back they print a small border!) and put a rub on on the right hand side.
Again I have used Glossy Accents and Glamour dust on the flower on the paper.

The Kaiser Papers were bought from The Stamp Pad in Greenfield. She also had lots of other goodies from Kaiser waiting to be unpacked.

I hope you have enjoyed seeing this project, and I hope it gets put up soon!

Monday 6 February 2012

An Engagement Card

Hi There

Today I would like to share with you an Engagement Card I made for a work Colleague.
I wanted to make something special for them both. The card is a 6" scalloped square card. The paper was some white paper with red hearts that I have had for ages (not sure which company), Forever Friends decoupage topper. The red is some 'plasma' sheets I got at a craft show many moons ago and then had now idea what to do with it! Here I have layered it over the paper and as you can see, although it gives some texture, you can still see the hearts paper underneath.
All the edges were inked with worn lipstick distress inks.

Thanks for looking

Sunday 5 February 2012

Well Hello There !

Sorry I have been away from Blog land for so long.

I seem to have got out of the habit of crafting, so haven't had anything to blog about recently.
I think I am starting to get back into the swing of things now, at least I hope I am.

This is a birthday card I made for my friends daughters birthday. She is lovely, a typical 14 year old, hence the picture of a slightly stroppy teenager. However she is very girly so I have added some flowers and done it in pink. The pink background paper had glossy flowers on it, but they are not quite as dark in real life.
The image is by Lili of the Valley and flowers from Wild Orchid.

I hope you like this card.